If we had to pick one part of a bathroom renovation that separates a good job from an expensive disaster, it would be waterproofing. Waterproofing is invisible once the tiles go down. It's the part of the job nobody photographs, nobody walks visitors through, and nobody thinks about — until water appears in a ceiling downstairs, or a tile pops off a wall, or a freshly-renovated bathroom needs to be ripped out two years later. In Queensland, waterproofing is the leading cause of bathroom rework. After more than a thousand wet areas, here are the five mistakes we see most often, and how to make sure none of them happen on your job.
Mistake 1: Skipping the bond breaker in internal corners
Internal corners — where two walls meet, or where a wall meets the floor — are the highest-stress points in any waterproofing system. The substrate around those corners is constantly moving, micro-millimetre by micro-millimetre, as the building expands and contracts with temperature and humidity. If your membrane is bonded directly to both surfaces at the corner, that movement will eventually tear the membrane.
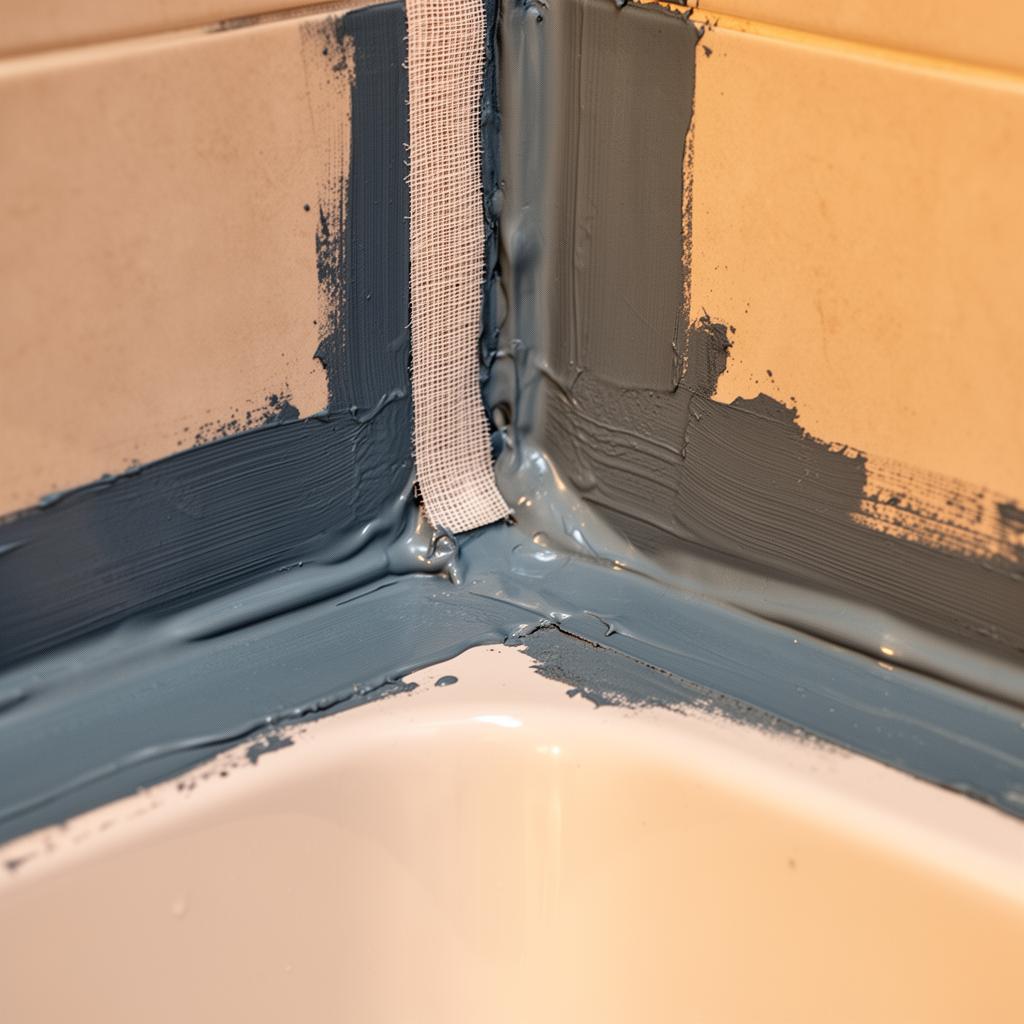
A bond breaker — typically a strip of low-tack tape, a length of backer rod, or a manufacturer-approved bandage — sits inside the corner so the membrane spans the joint without being glued down at the apex. This allows the corner to move freely without stressing the membrane.
Skipping the bond breaker is one of the most common waterproofing shortcuts, and one of the slowest failures to show up. You won't know about it for two to five years — by which point the only fix is to demolish the bathroom and start again.
Mistake 2: Insufficient cure time before tiling
Every waterproofing membrane has a manufacturer-specified cure time. For most liquid-applied membranes, this is 24 to 48 hours between coats and another 24 hours before tiling can begin. In a hot, humid Queensland summer, those times can stretch out further.
On rushed jobs — particularly on tight deadlines or in commercial fitouts — we see tilers starting to lay tile within hours of the second membrane coat. The membrane looks dry on the surface but is still curing underneath. Tiling onto a partially cured membrane traps moisture, prevents full cross-linking of the polymer, and dramatically reduces the long-term elasticity of the system.
If your job is being rushed and the membrane was applied this morning, push back. A day of patience is cheaper than a complete rebuild.
Mistake 3: Relying on the silicone bead alone at floor-to-wall junctions
Silicone is not waterproofing. It's a flexible sealant designed to bridge a movement joint, and it has a useful life of around 5 to 10 years before it goes brittle, pulls away from one surface, and starts letting water through.
A correctly waterproofed floor-to-wall junction has a continuous membrane wrapping from the floor up the wall by at least 150mm in dry areas and 1800mm in shower walls. The silicone bead at the tile junction is purely cosmetic and to keep dirt out. If that silicone fails, the membrane behind it is still doing the actual waterproofing.
Where this goes wrong is bathrooms that were waterproofed with the membrane stopping at the top of the screed and the silicone doing the rest. The first time the silicone perishes, water tracks behind the tiles and into the wall cavity. We've stripped bathrooms apart where the only thing standing between water and the joists was a 3mm bead of 8-year-old silicone.
Mistake 4: No certificate of compliance
In Queensland, waterproofing of internal wet areas is a licensed activity. The person who applies the membrane needs to hold a waterproofing licence (a sub-class of a QBCC licence), and they're required to issue a Form 16 certificate of compliance for the work.
If you didn't receive a certificate, the work isn't documented. If you go to sell the house in five years and the building inspector asks for proof the wet areas are compliant, you have nothing. If the bathroom fails inside the statutory warranty period, you have no evidence of who is liable.
Always ask for the certificate. Always keep it with your house records. If a contractor refuses to provide one, walk away — they're either unlicensed or cutting corners they don't want documented.
Mistake 5: Bargain-basement membranes
Waterproofing materials are one of the genuinely false economies in a bathroom build. The difference between a premium membrane system (Ardex WPM, Mapei Mapelastic, Davco K10, etc.) and the cheapest membrane on the rack at a hardware store might be $200 to $400 on a typical bathroom. The difference in performance over a 20-year life is enormous.
Premium systems are tested to thousands of cycles of movement, certified to AS 4858, supported by technical helplines, and warranted by the manufacturer for the life of the application — but only when installed by a trained applicator using the full system (primer, bandage, membrane, top coat). Cheap systems often skip these guarantees.
If the quote you've received doesn't specify which membrane is being used, ask. If the answer is vague ("just a standard waterproofer"), be cautious. Any tiler proud of their waterproofing will name the system in the same sentence.
How to spot a good waterproofer
When you're choosing a tiler — or watching one work — there are a few things to look for. The membrane should be applied in two contrasting colours so you can see complete coverage between coats. There should be a bandage or reinforcing mesh in every internal corner and every pipe penetration. The membrane should extend at least 1800mm up the wall in any shower area, and turn out onto the floor by at least 150mm at hobs and doorways. Penetrations (taps, wastes, mixer bodies) should have a manufacturer-approved collar or top-hat.
If you see a tiler applying one thin coat with a roller, no bandage in the corners, and going straight to tile-laying the same afternoon — they're not waterproofing your bathroom. They're charging you for the appearance of waterproofing.
When to re-do an existing bathroom's waterproofing
If your bathroom is more than 15 years old and the waterproofing has never been touched, it's worth a conversation — particularly if you're seeing any of the early warning signs: efflorescence (white powdery deposits) at the base of shower walls, paint blistering on the wall behind the shower, hollow-sounding tiles when you tap them, or a faint musty smell that never quite goes away.
Re-doing the waterproofing always means stripping the tiles. There's no spray-on retrofit that works. But finding the problem now, while it's confined to the bathroom, is dramatically cheaper than finding it once it has reached the joists, the framing, or the room below.
The short version
Use a licensed waterproofer. Insist on a certificate. Use a premium system. Wait for the cure. Don't trust silicone to do the waterproofing's job. None of this is glamorous, but it's the difference between a bathroom that's still perfect in 2045 and a bathroom that's being demolished in 2030.
If you'd like us to look over a quote you've been given — or talk through what's been spec'd in your bathroom — give us a call on 0432 651 609 or send a message through the contact form. We're happy to give you a second opinion.
Get a quote
Planning a tiling project on the Sunshine Coast?
Call Maroochydore Tiling on 0432 651 609 or request a free quote.